BMW R1200 GS Air/Oil fuel filter cleaning and Guglatech Rally Raid MOD
ATTENTION:
The following instructions for BMW R1200 GS Air/Oil fuel filter cleaning are very very easy to follow, but you are DEALING WITH PETROL !!!
I/WE do not take any responsability on YOUR action and all you will do on your bike will be ON YOU ONLY.
Petrol EXPLODES, SMELLS BAD, KILLS, if you have any doubts hands OFF!!!!
Any doubts?? DO NOT DO IT!!!
The Rally Raid MOD will also invalidate your street approval!!!
WORK IN A VENTILATED ROOM, petrol fumes are toxic!!!!!
What you will need:
1. Nitrile gloves and plenty of kitchen or workshop paper,
2. Plastic or metal bowl PE, PA, PET or PP, not other materials,
3. Fresh petrol and two flasks of some good injector cleaner
4. Syringe, better if all plastig, the rubber piston ones will last relly short, petrol is a Hell to work with
5. Should your fuel pump be very noisy while firing up the engine, it may be the moment to swap a new one, at the moment many Beemers do suggest that the best swap is the Bosch 0580 453 443, check it before buying it please!!
6. Screw bracelet or Oettiger if you have the right tool,
7. Mixed tools, open-end wrench #19, flat screwdriver,
8. Air compressor is a plus, but not a must, it makes the whole procedure much much faster,
9. Teflon Tape, the one used in plumbing will do perfectly
10. I do recommend, should the bike have some years, to swap the flange gasket with a fresh one, BMW OEM part number : 16117677883
I have been thinking of making a detailed instruction with some nice photos about the hidden fuel filter in many BMW models, all GS from 2004 until 2012, the new R Nine T based models, many K among which the S1000 RR and so on.
BMW was great in hiding the fact that THERE IS A FUEL filter in the fuel system, and it could not be otherwise, but the bad part is that is not serviceable, it cost between 560 up to 650 euro depending on market and model, I'd say I had to find a solution to that :0
There are plenty of videos on how to change a filter on a BMW 1100/1150, on a F800 or even BMW R1200 LC, but nobody has ever put a video of what is in the previous models, the one between the 11xx and the LC, and here we are :)
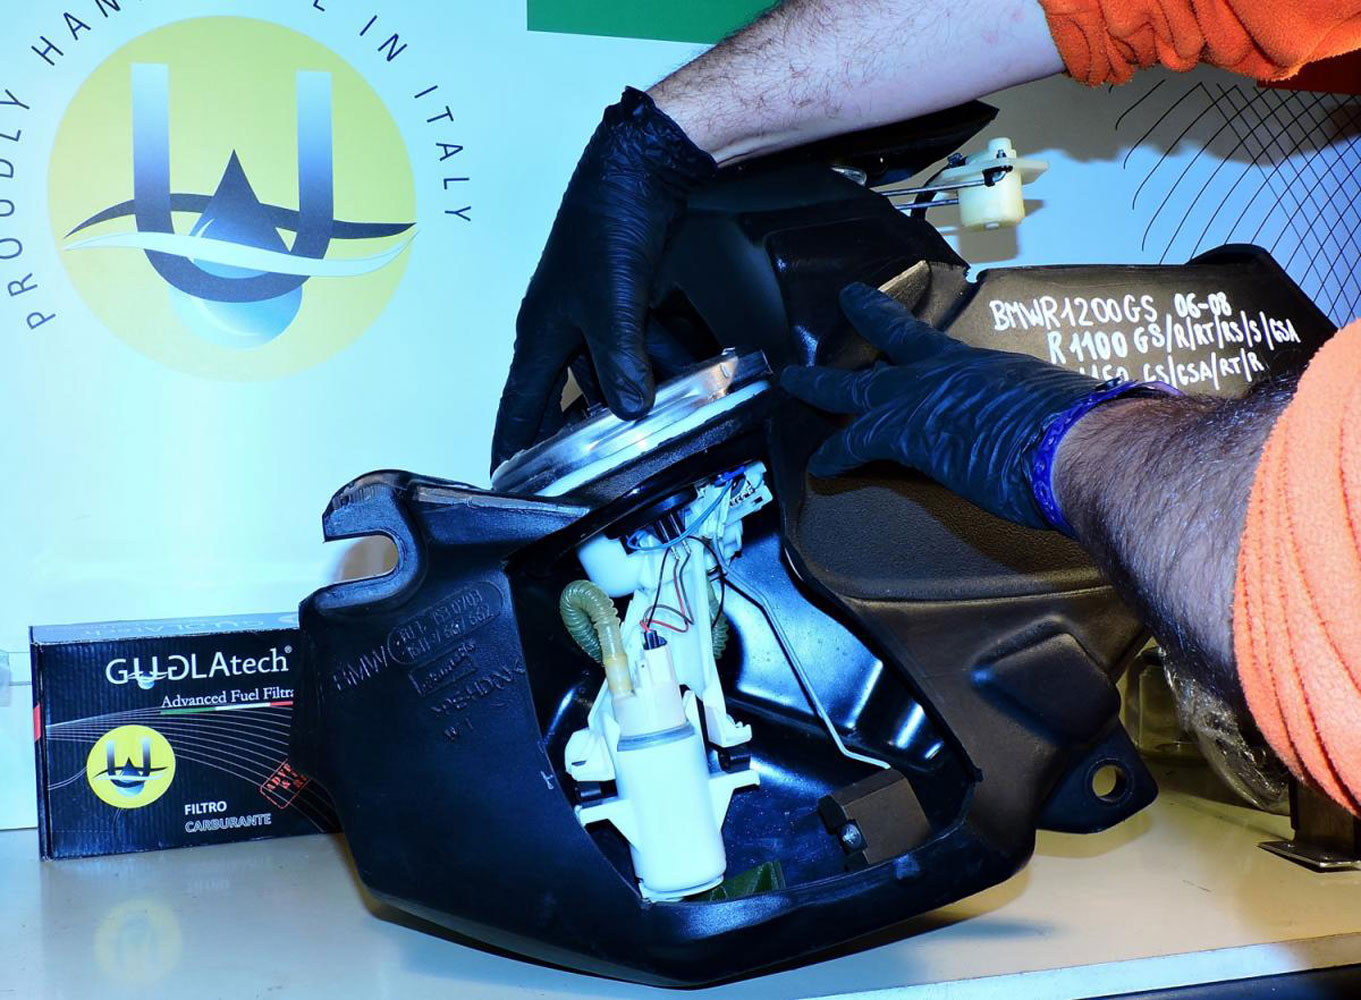
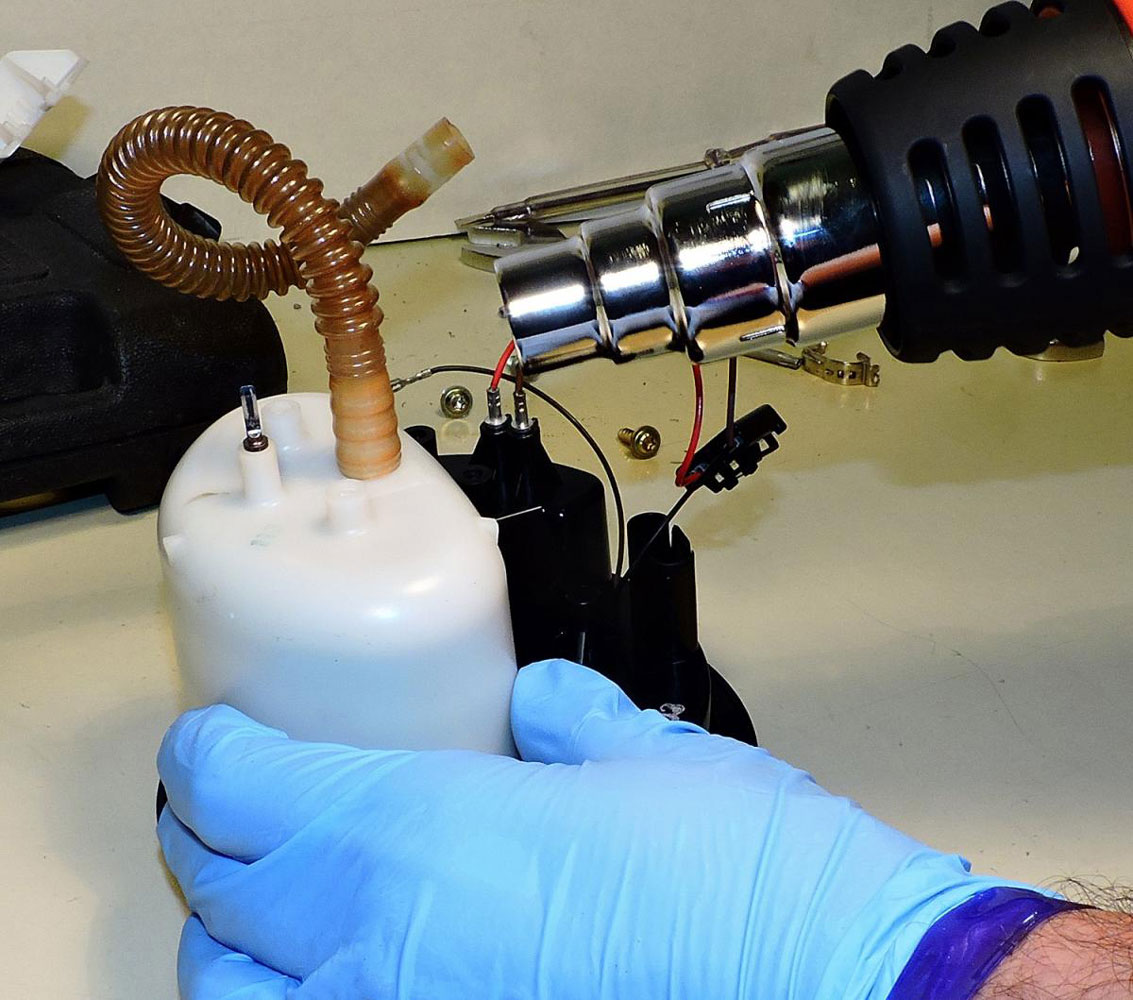
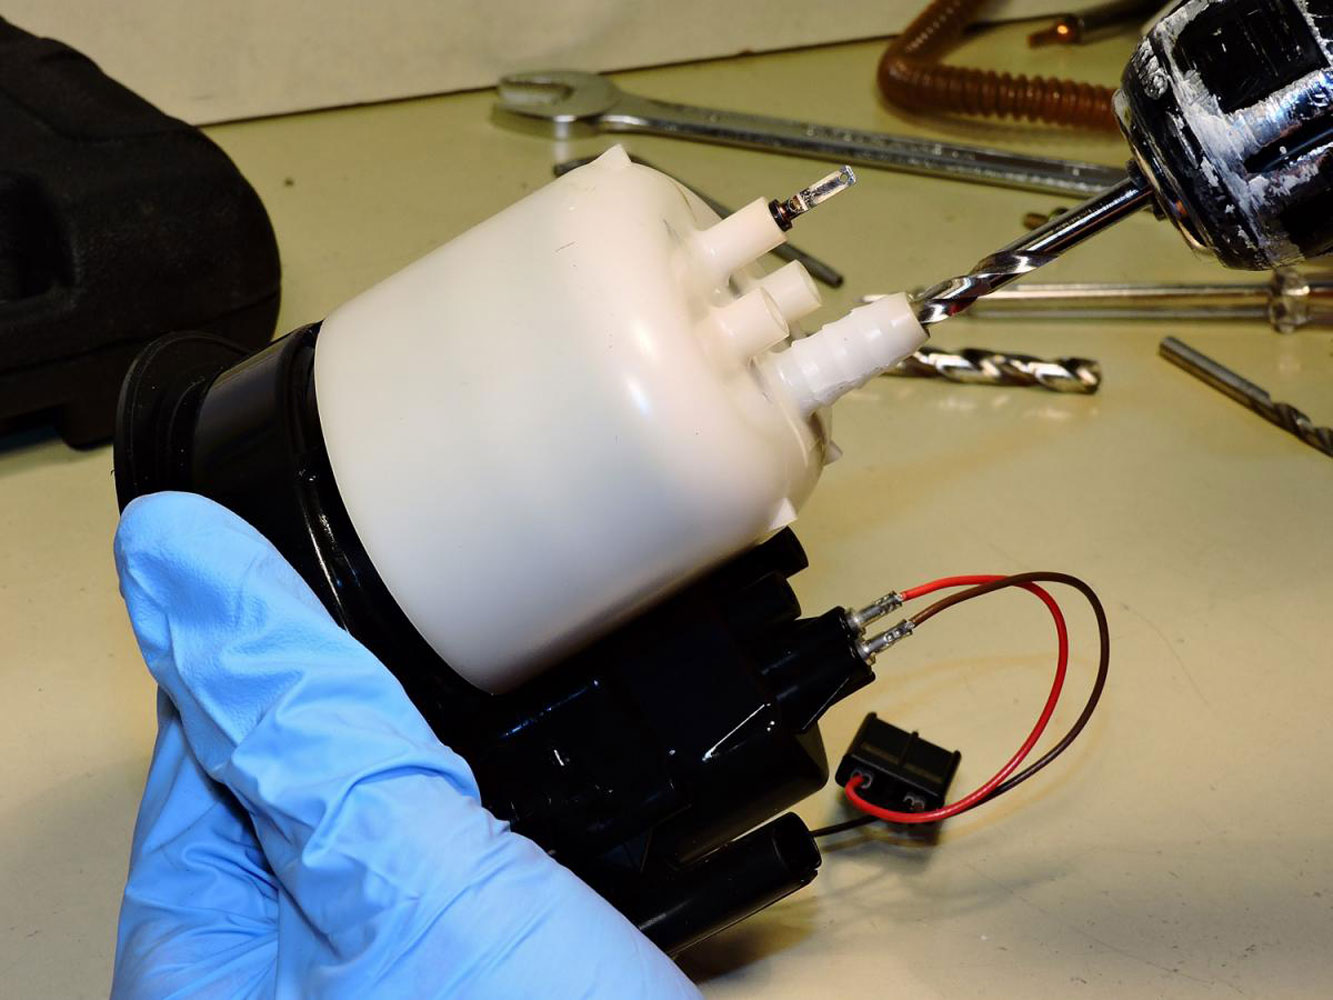
This is what you will find in your bike, on the BMW R1200 GS Adventure the filter sits in the left part of the tank, the right part is the "equalizer" pump, it will simply move petrol from right to left.
The STD versions have the return line from the FPR direclty in the main flange, you can see where the hose would go.
First of all unclip all parts, hose and connectors.
Now, to access the fuel pump there is no need to take down the fuel tank, but make sure you are below 2/3 fo fuel.
Using a rubber hammer and a wood or plastick handle, hit the flange so that it will rotate anti-clockwise.

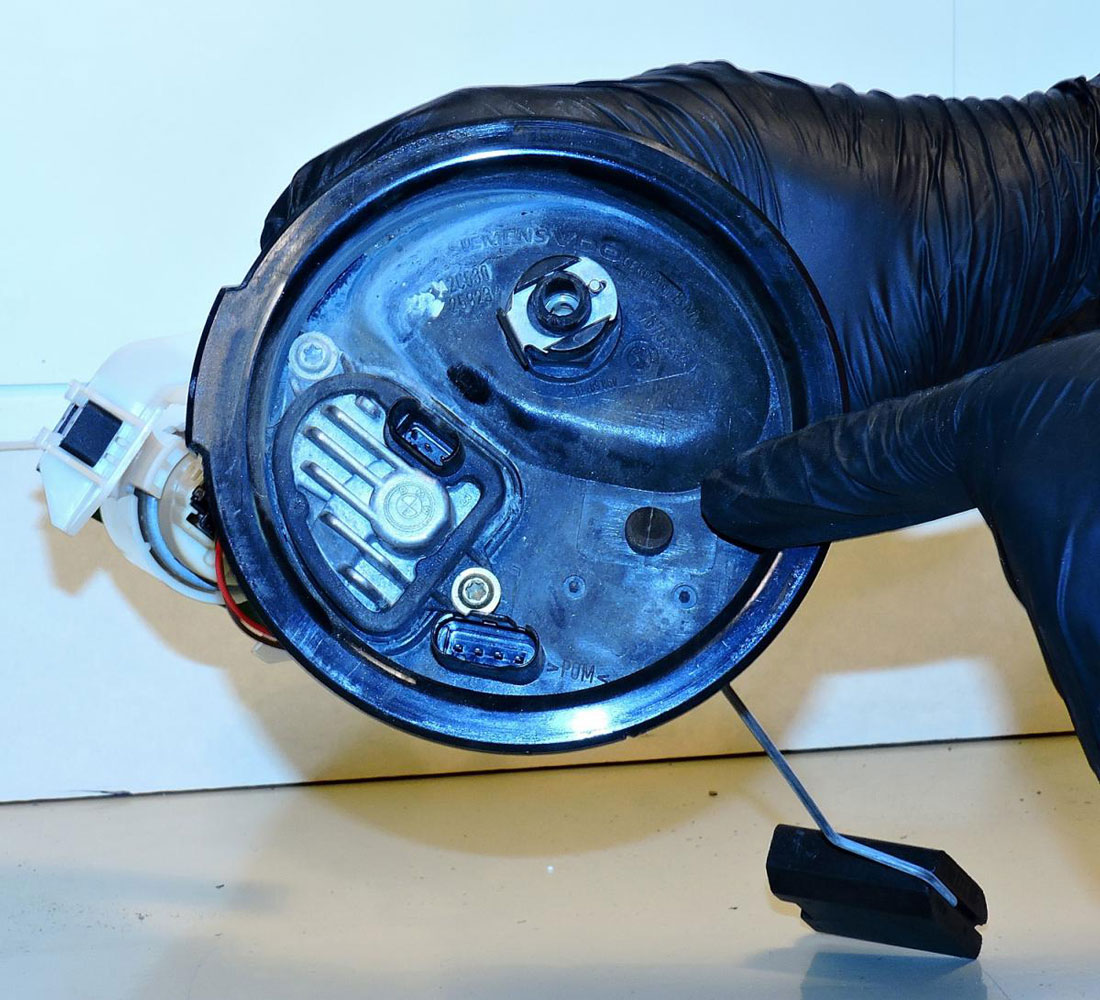
Once the pump will exit the tank, again, all connectors and clips must be separated. Be careful, they are quite delicate.
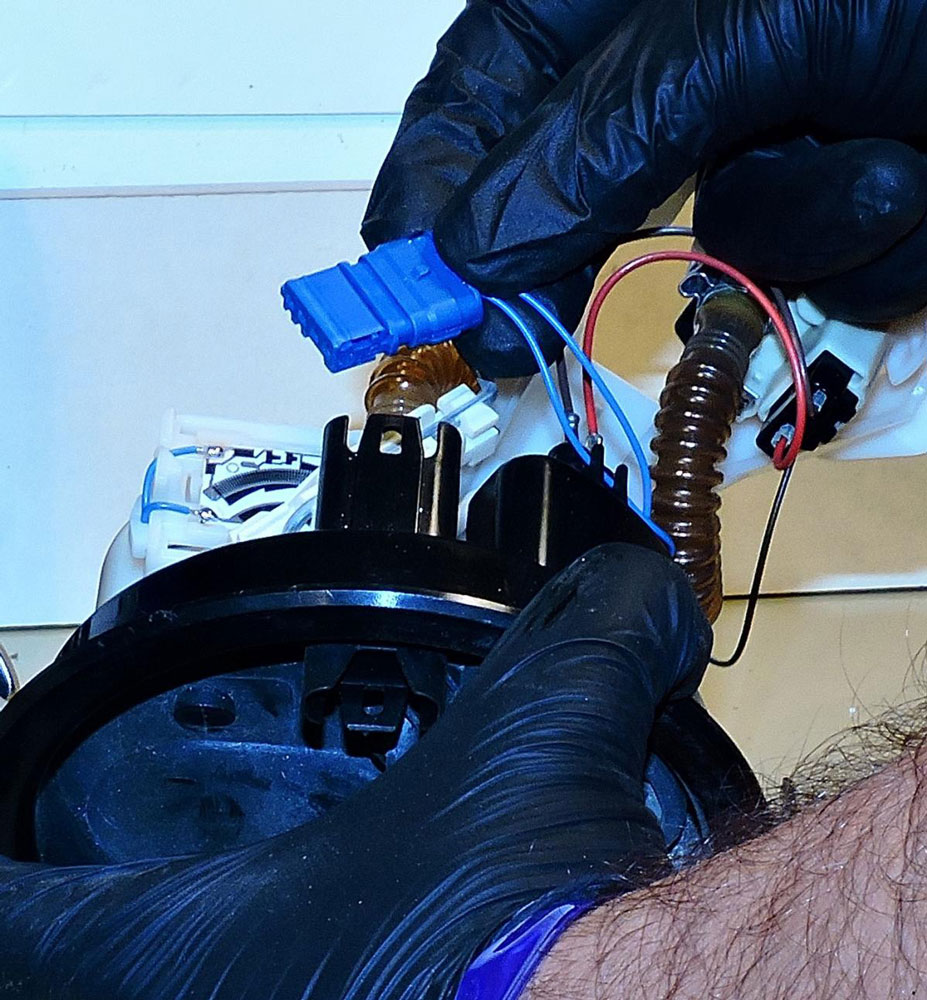
Now we have to release the fuel pressure kept between the quick disconnect ad the fuel pump, otherwise the fuel will spray all over you.
We have to techniques here, super PRO and "Garage" style :)
Super Pro needs a CPC 8mm quick disconnect male with a long fuel hose running to the bowl, press the plug in and let the fuel run to the bowl.
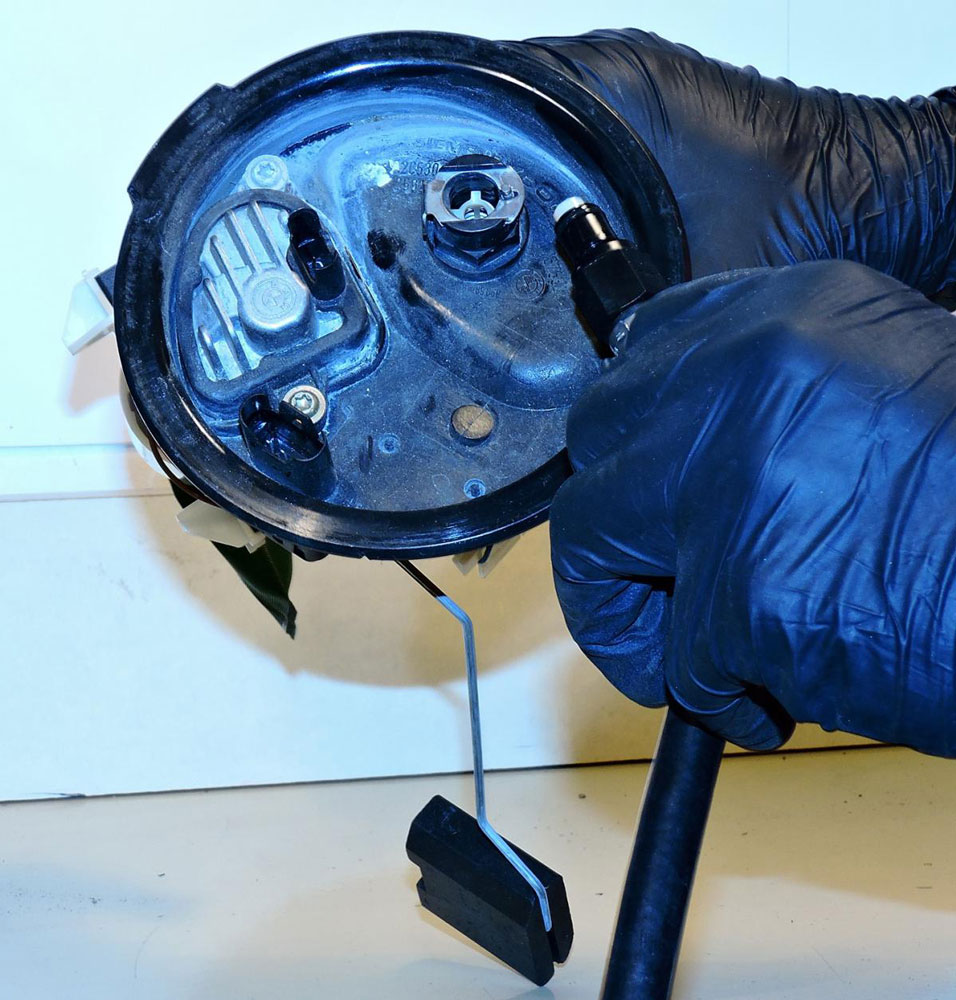
Garage style, simply use the #19 wrench and open the female CPC putting a cloth around it, it will spray and than some fuel will come out, period
Do not force a screwdriver inside, it may ruin the CPC plasti parts.

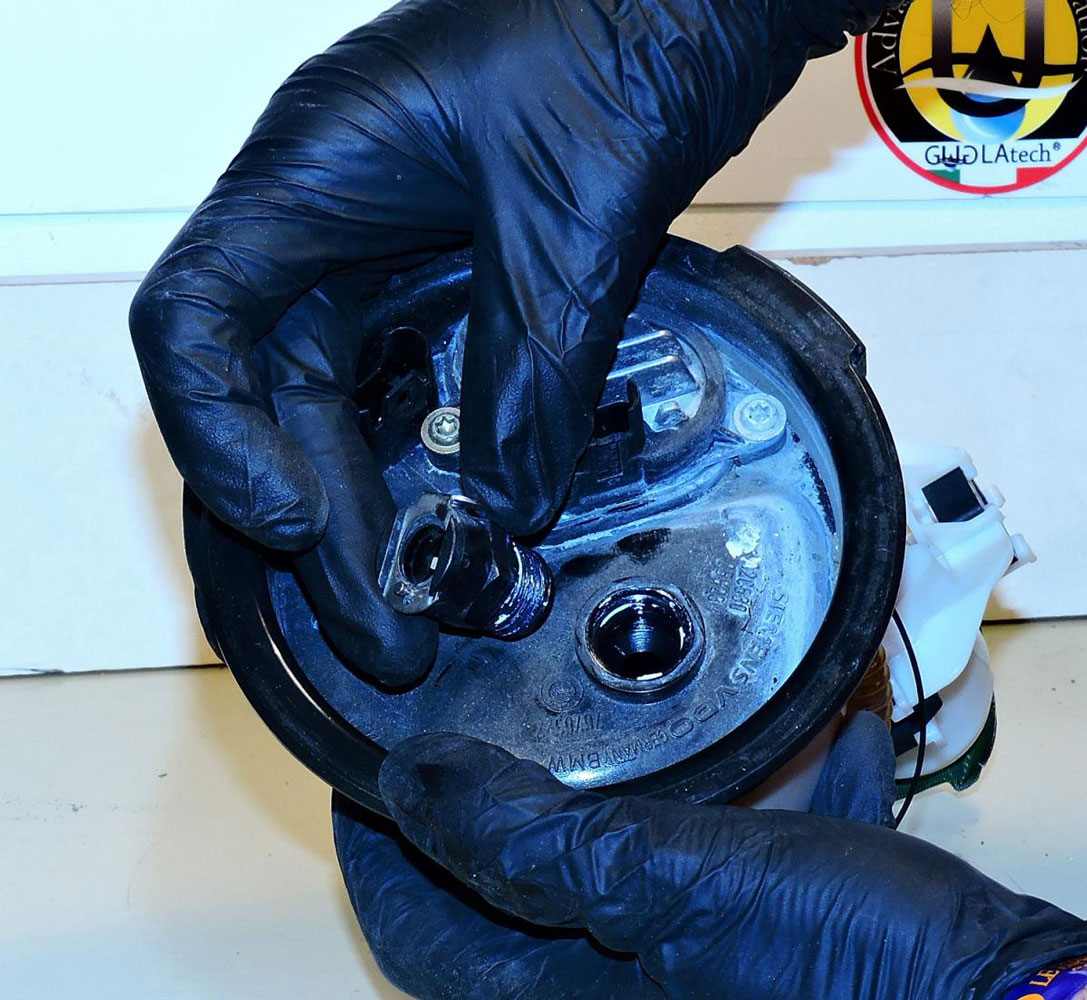
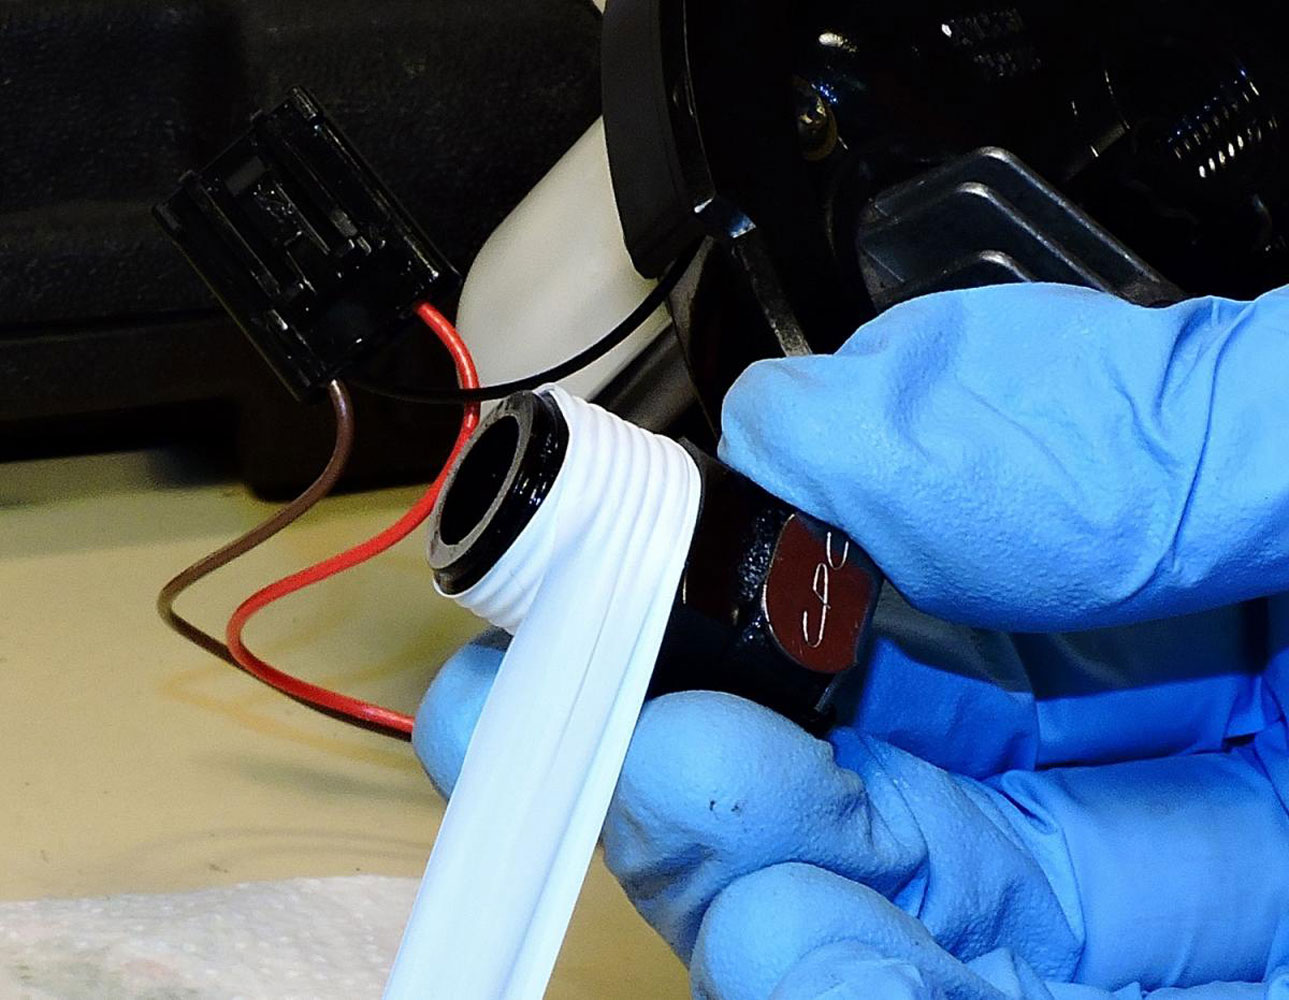
The white "stuff" on the thread is the sealant, we will clean it and use the Teflon tape to seal everything back.
Depending on your year of production and model, you may have or not the fuel sensor, if it's there, take it off, or it may be damaged by the handling of the pump.
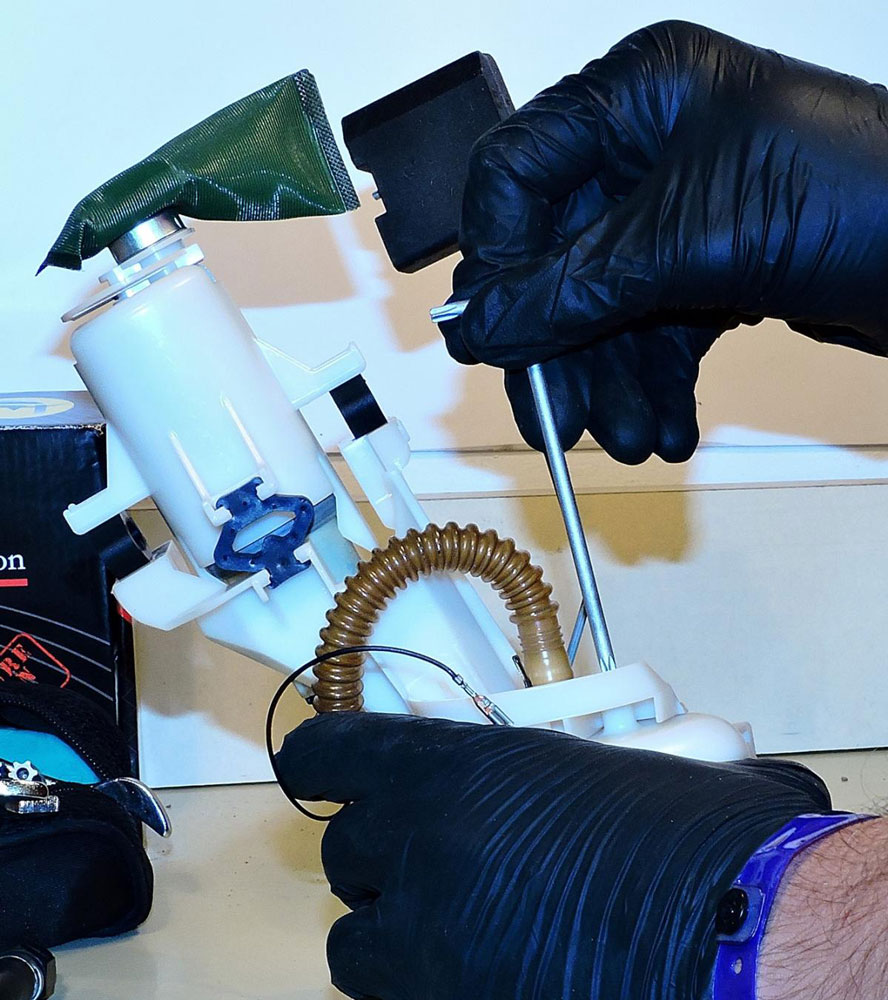
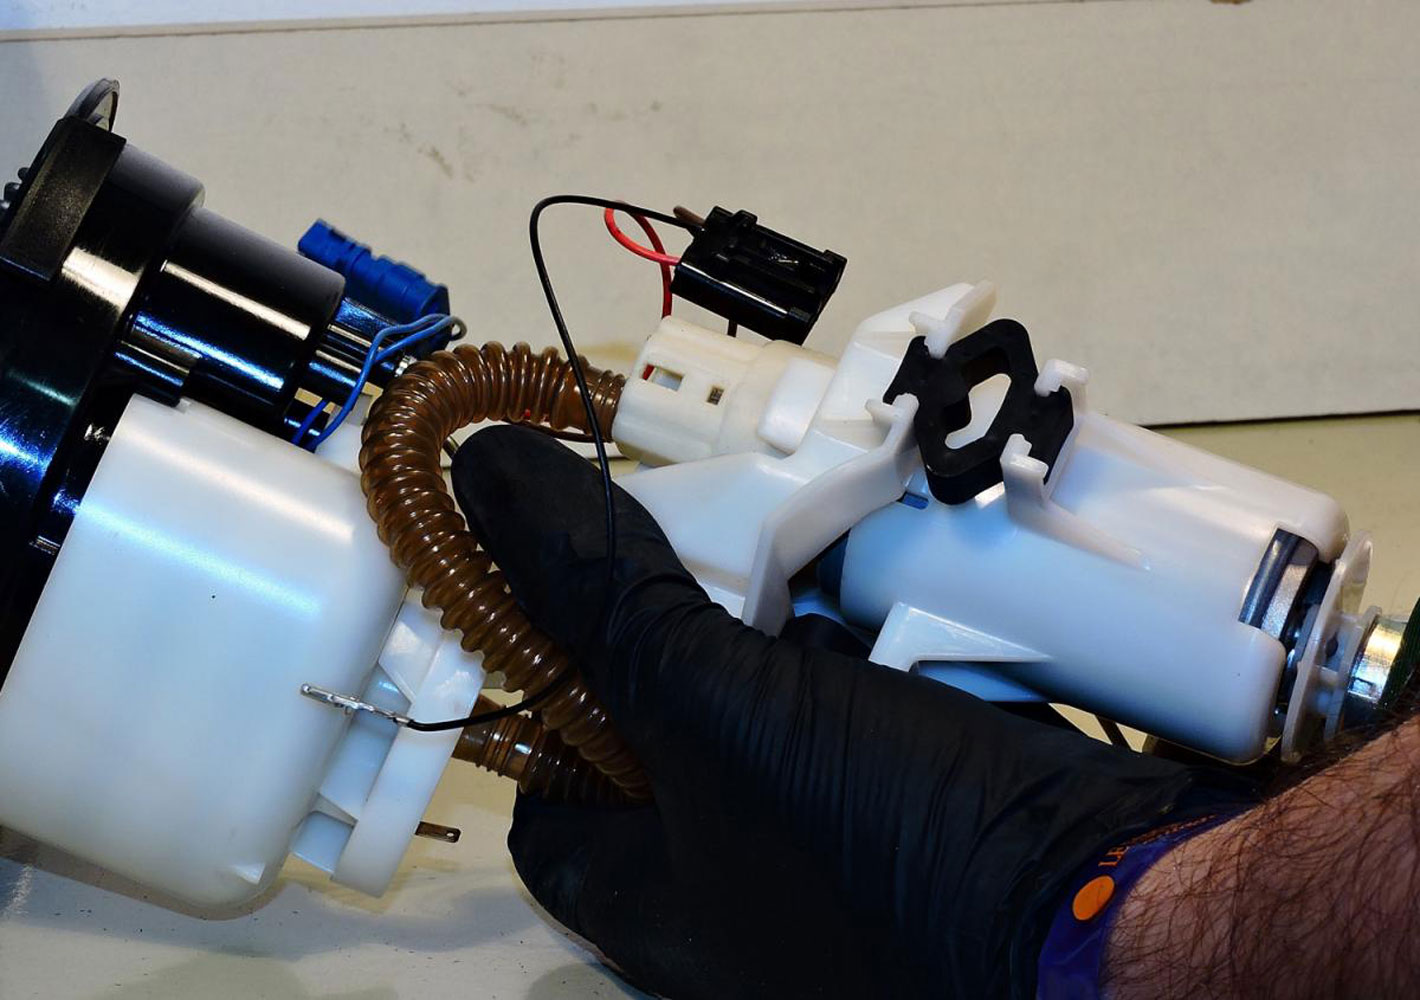
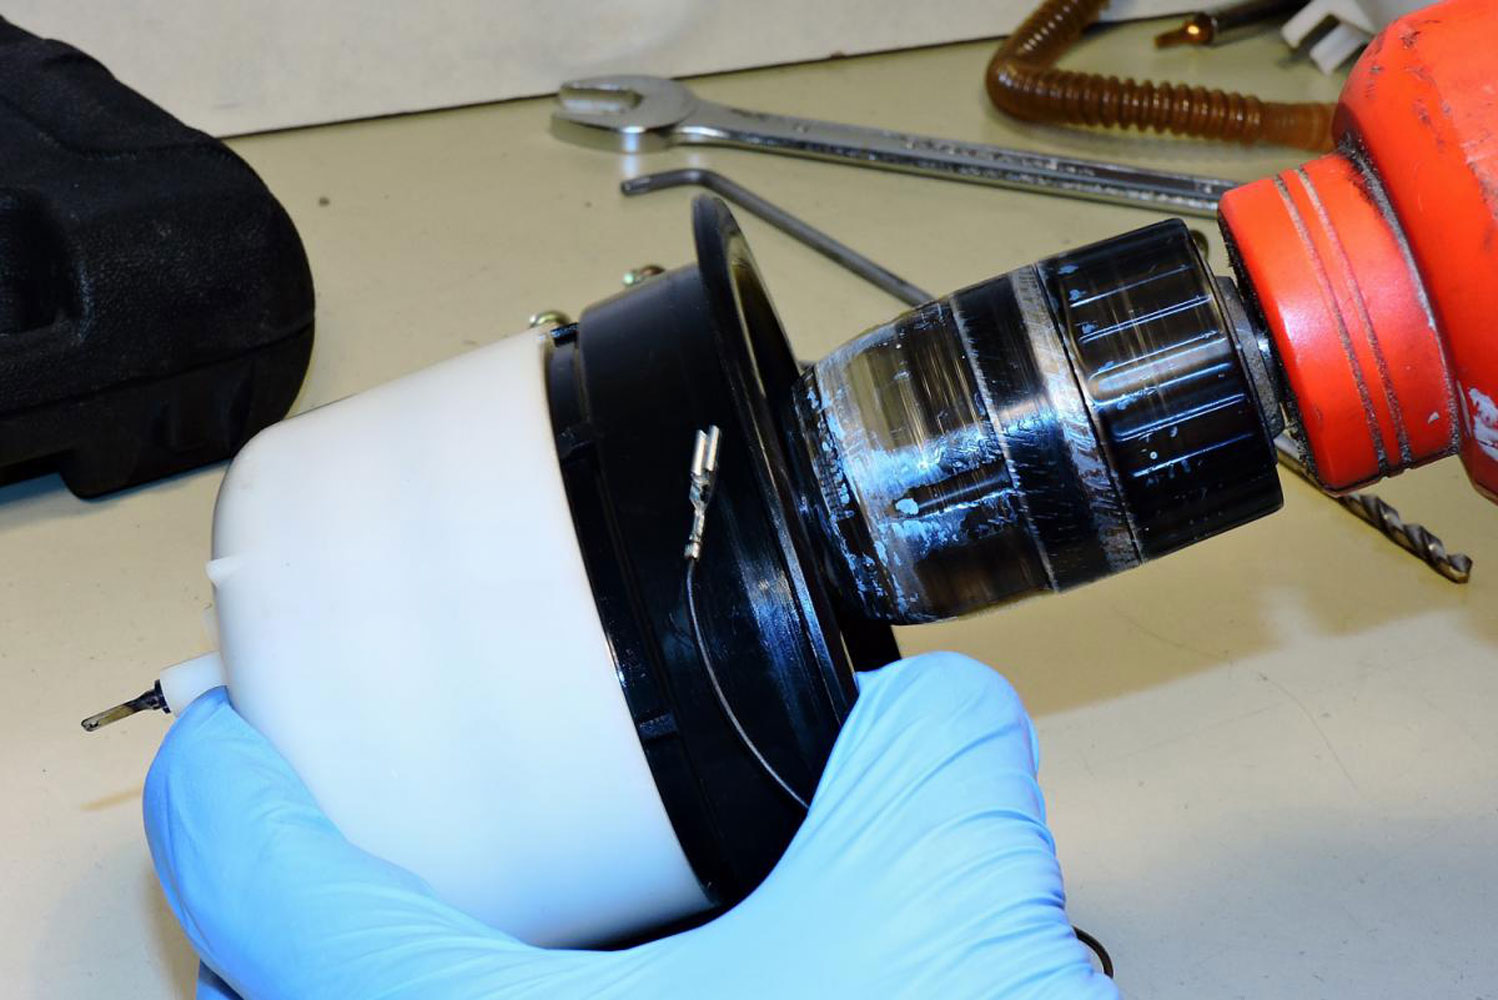
Now procede with taking the fuel pump of the bracket.
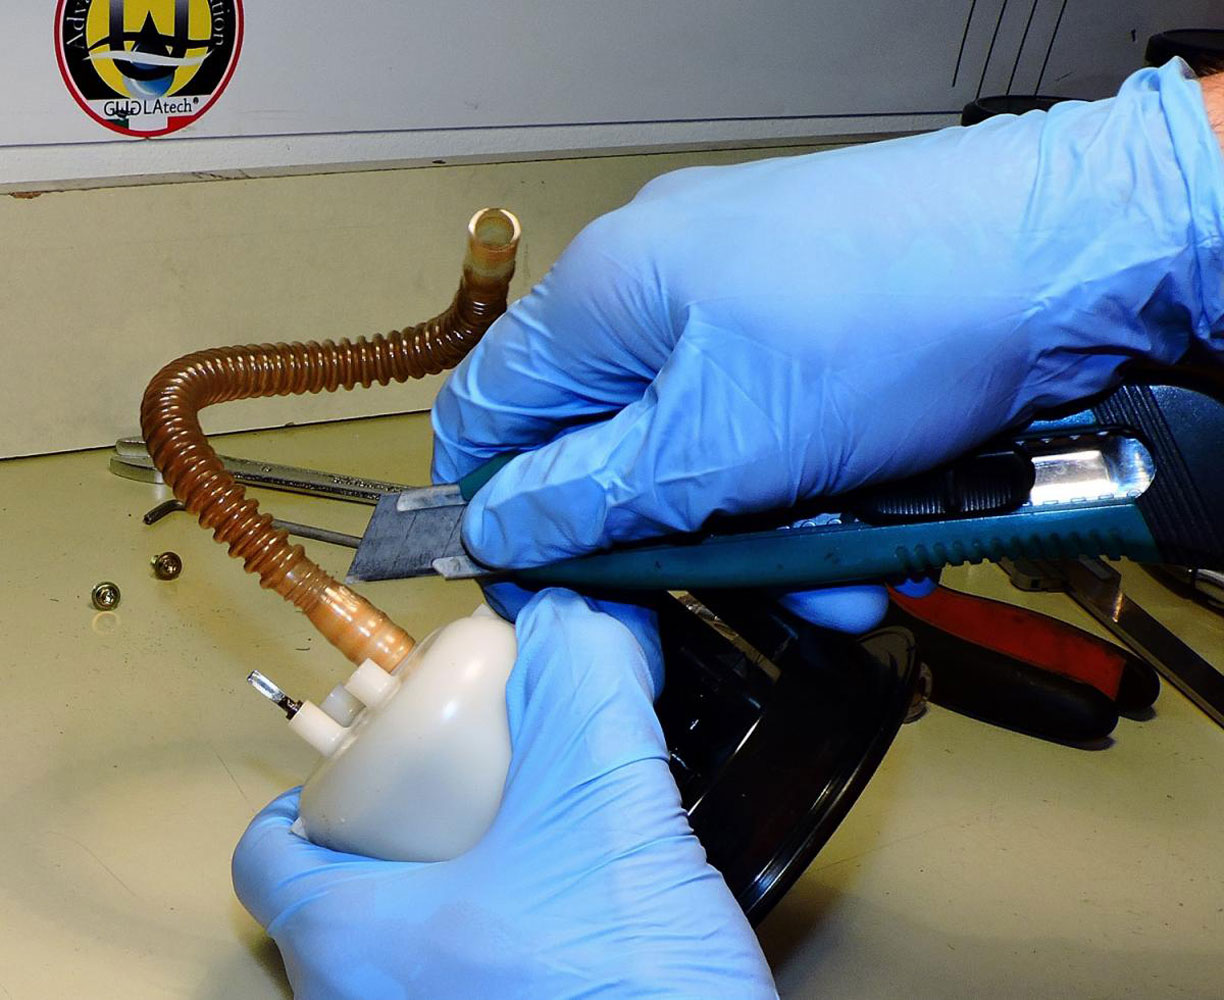
You need to free the fuel hose, DO NOT attempt to do it from the filter side, it is barbed and you may endup destryoing the fuel and having to throw everything in the bin.
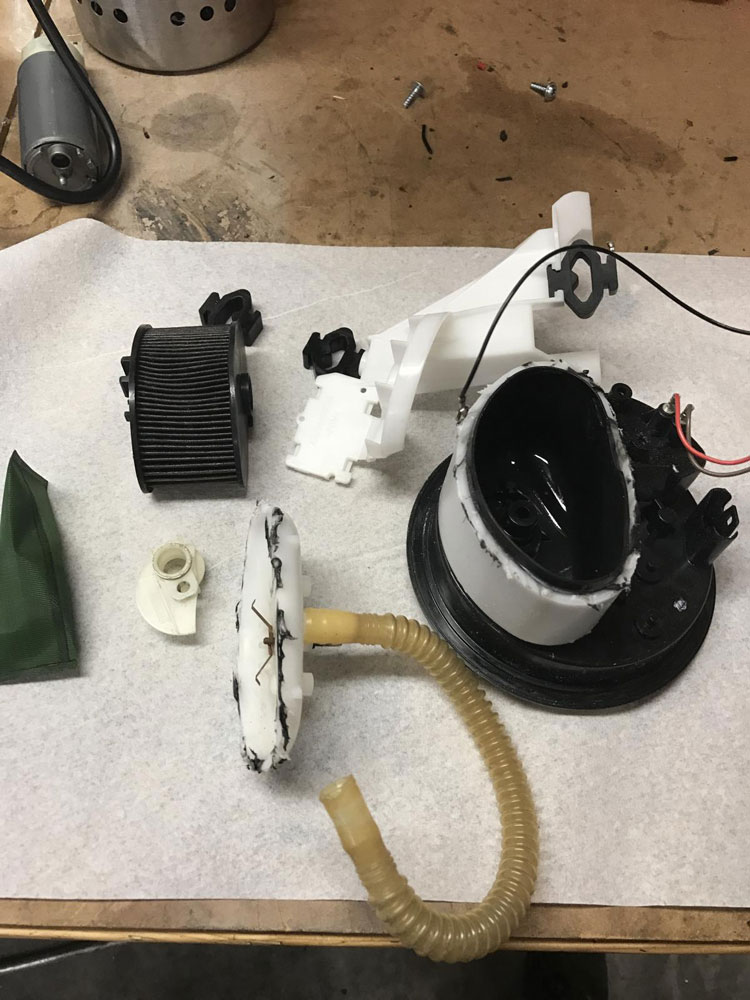
Remove the rubber mounts, and, without removing the fuel stainer (I did for research purposes, you do not need to), cut the bracelet off.


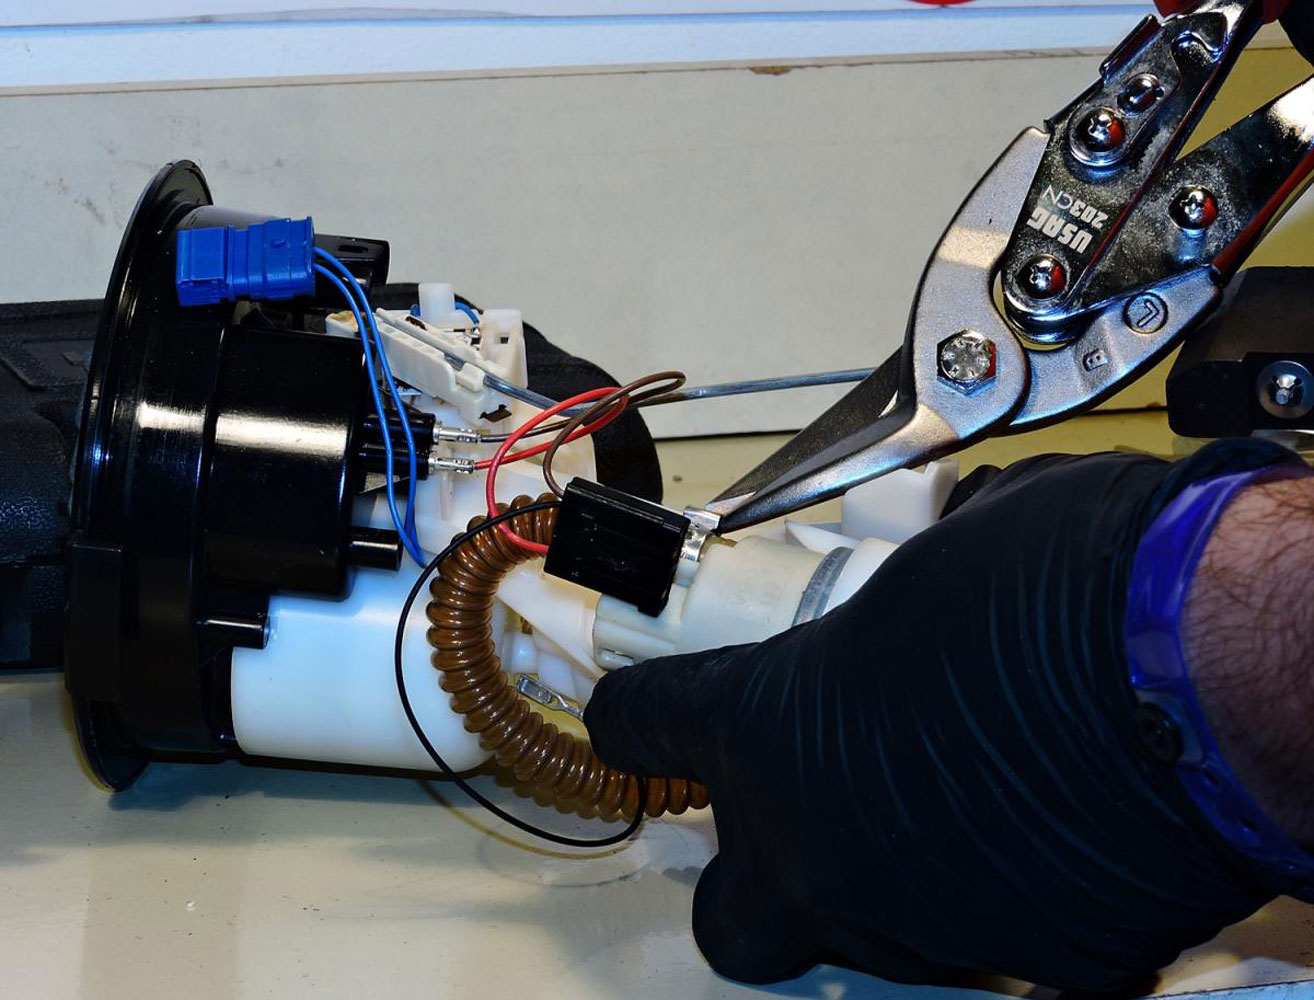
pump and separete the hose, now you have full access to the free system and you can start back-flushing it properly.
Now it's time for the RED pill or the BLUE pill.
The Blue pill, you will simply do a great service to your bike... Flush the OEM system 97% clean and live happily everafter.
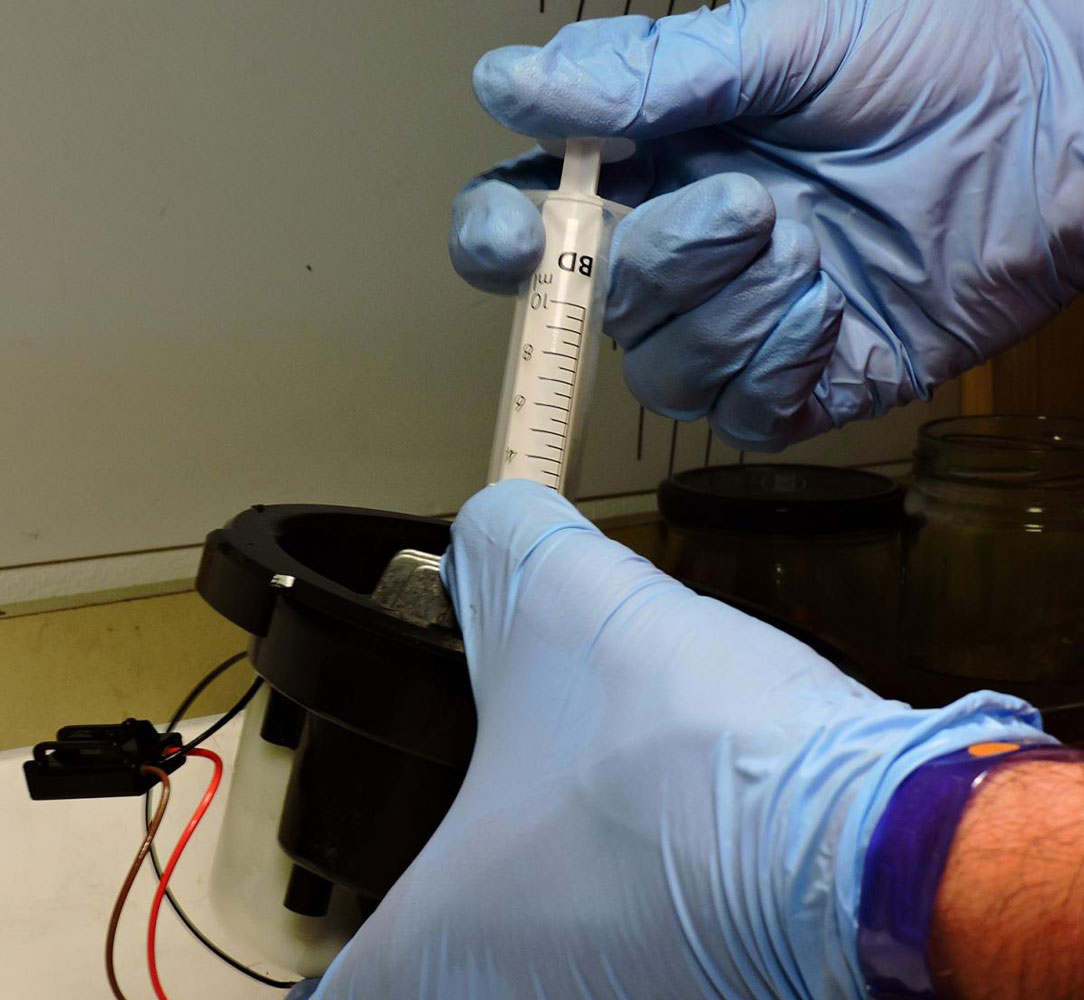
Take a bottle or a glass jar, mix fresh clean petrol with Injector Cleaner Liquid, usually one medium size jar, one finger of injector cleaner topping off with fresh petrol, higher dosis in case the system was full of dirt and curd, fill up the syringe, and from the exit of the fuel pump inject the liquid, shake it and put more untill it fills up the hose too.
Let the mixture act for 10-20 minutes and make sure to flush it back toward the fuel pump hose, not from where you were loading the mixture.
An Air compressor would help greately now, adding pressure to the cleaning. :)
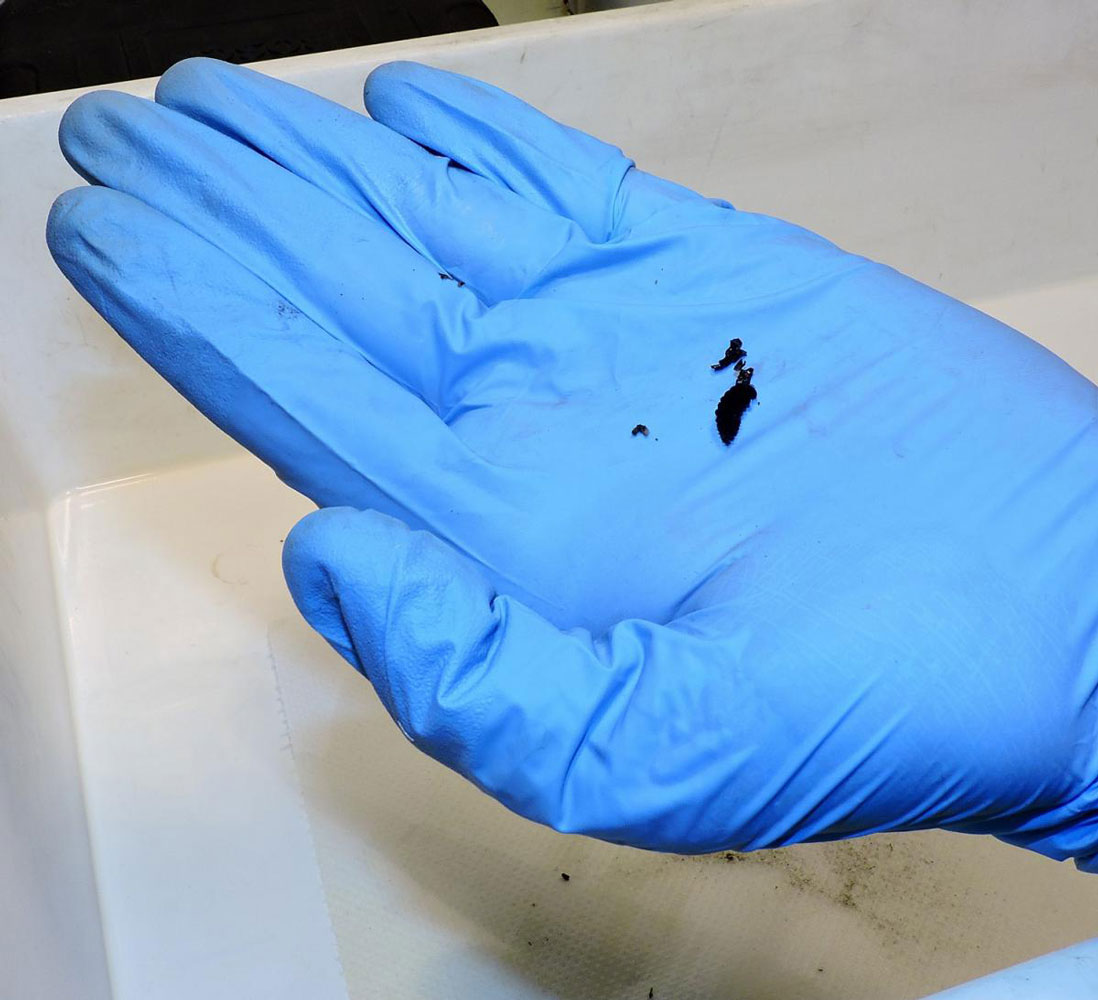
Now, don't be scrooge....... use as much mixture and time to have only ultra clean petrol exiting the hose, the cleaner the petrol will be the longer the procedure will last.
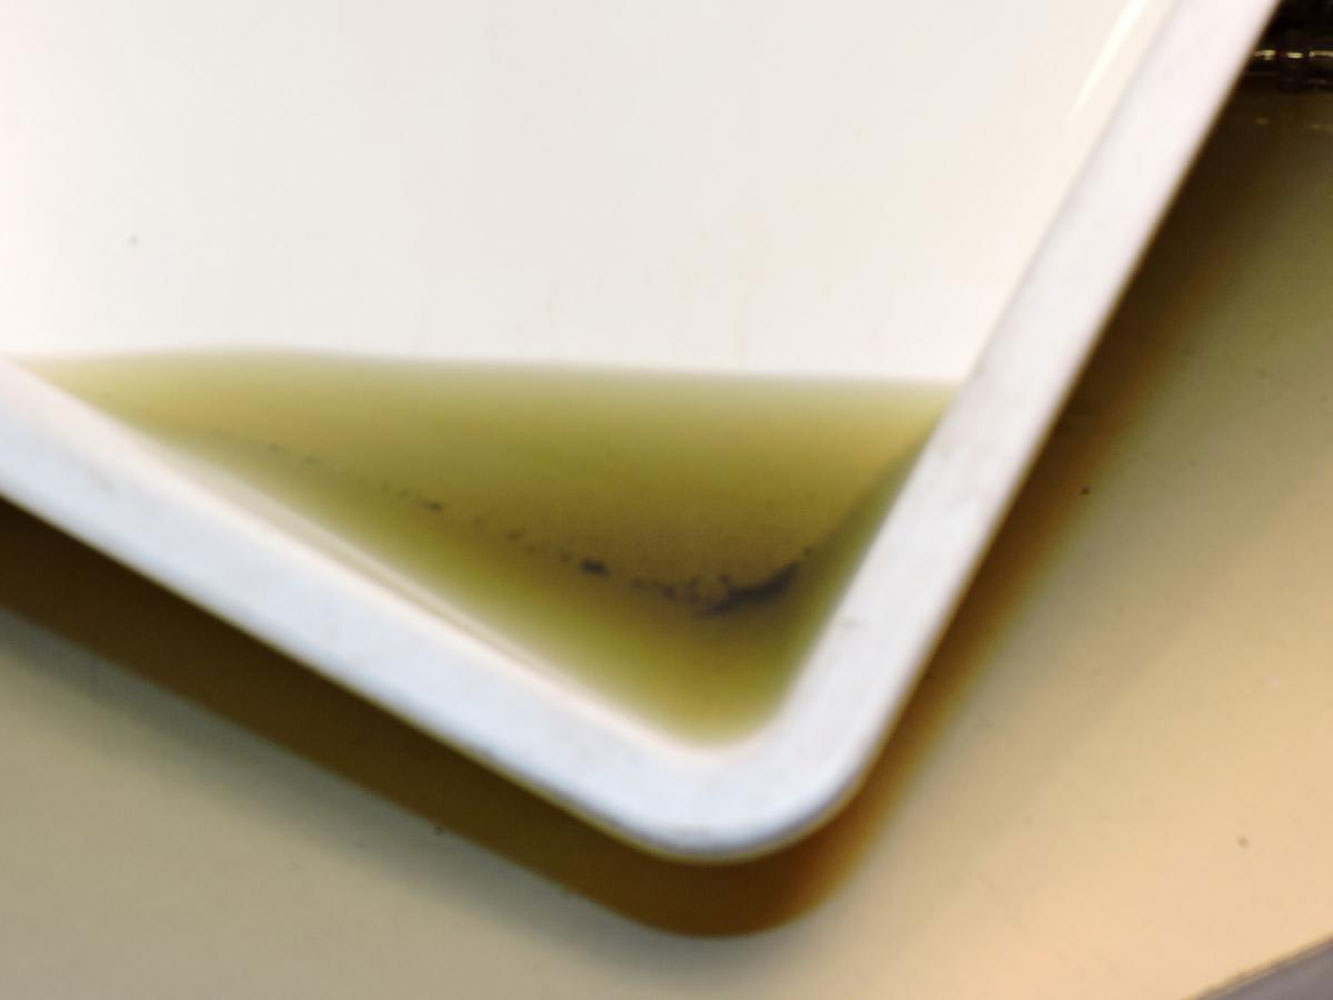
Put all the cleaning mixture in a plastic bottle, let it sediment, it will shock you to see what will deposit at the bottom after some time. Mostly you may even be able to use the petrol again after a good filtration.
Now, put the Teflon tape on the thread of the CPC and mount all backwards.
To avoid some not nice sitautions, you may pre-charge the system with fuel too.
Close the hose with a finger or a cork, fill the filter with fresh petrol until is level with the CPC mounting thread, install the CPC with the teflon tape, don't over tighten it, it will snap, flip the flange over, let air exit the hose and fil with fresh petrol too.
Mount the fuel pump with a new INOX W4 bracelet, done.
Anyway, the first time you will want to start the engine again, turn the key 5-6 time without starting the engine to make sure petrol is filling up the whole system nicely.
Oh, you have chosen the RED PILL ????
Well, this will alllow you to GET RID OF THE ORIGINAL CLUMSY DESIGN and implement the Guglatech Rally Raid Concept.
Now, the steps are easy and really simple, the concept is fantastic, but you must pay attention in order not to ruin the plastic cage of the OEM filter unit.
Now, since the whole filter system will be bypassed, it is imperative that you do the filter cleaning first, YOU DO NOT want to waste the new filter you will mount due to contamination from the old one :)
Next step tools:
- Drilling points, 5mm and 8mm, I don;t want to say to use good ones, I want to say use NASA grade ones !!!!! It will make such a huge difference in the drilled left overs.
- A good light drilling machine, if you have a drill press good on yer, time to put it into action :)
- A good calliper
Get your pray book and read any page randomly :)
Now here things get intresting, the whole concept is rather easy but extremely good and performing.
The white capsule forces you to keep the original fuel flow, not only you cannot change it, but also the flow change diameter quite e few times, and WE know that this is no good.
We will transform the BMW with the adoption of the Guglatech KTM 990 Rally Raid system.
Below you can see what sits inside the white capsule, a boring paper filter, quite big in size, but eventually everything clogs up, even huge monsters such as these babies.
We will allow more free flow meaning a better throttle response, no more pressure, just a better engine response to gas.
NO WAIT, don't go anc get the SAW.... it's way simplier :)
This is a 1200 cc engine, one would expect a full 8mm bore system, even KTM realised that the 6mm bore system on the 690 was too small for the 690 cc thumper, how come BMW choose a 5mm reduction?? I'm lost, really, I cannot think of any reasons, plus changing costantly size lenght and angles in any liquid flow creates cavitation, and this is VERY BAD.
So, let's say we stay loyal to the BMW design, mount the 5mm drilling point on your sparkling drilling machine (mine has 22 years, has done everything, and still delivers..... shaking and vibrating like a real PRO though :))
If you have not changed the hose and/or fuel pump, we will make only one hole the most difficult and precise one, if I may be so bold.
We have to make a hole in the bottom of the rubber end of the fuel filter hidden so to allow a direct fuel flow bypassing the whole filter.
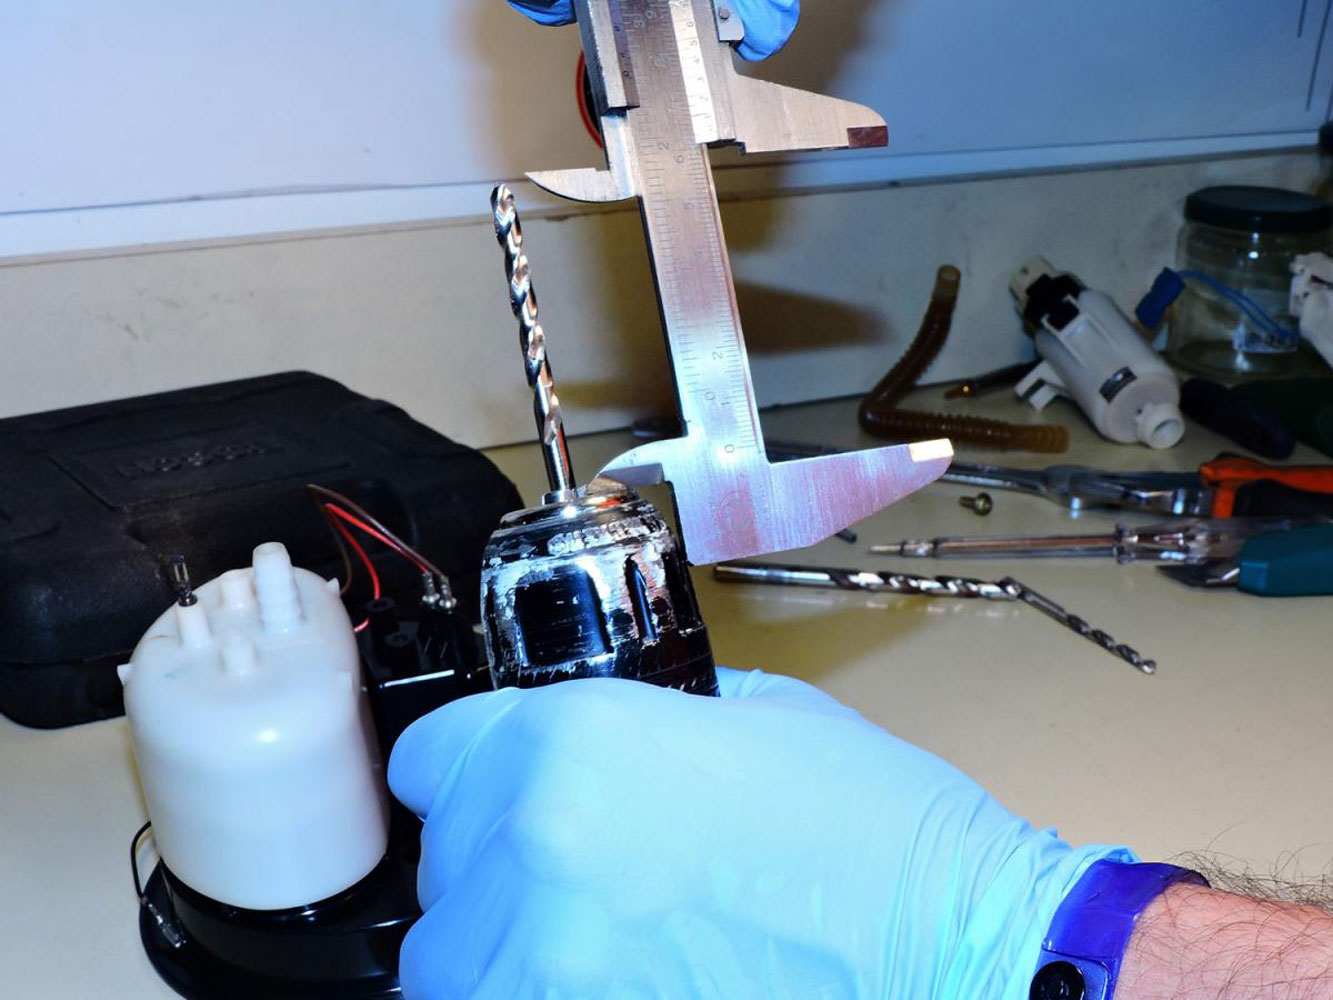
I neasured mine many time, and I come up with a depht of about 63mm, any longer and you will drill through the capsule, and you can kiss goodbye the whole pump/system.
65 mm may be too much, 67 you will start drilling the plastic case NO GOOD !!!!!!
Remember, YOU ARE ONLY DRILLING THE HIDDEN FILTER, not the whole capsule :)
I suggest to set the drilling depth to 60mm, see if you drill through and than increase 1mm at time, once you have drilled through, you're done.
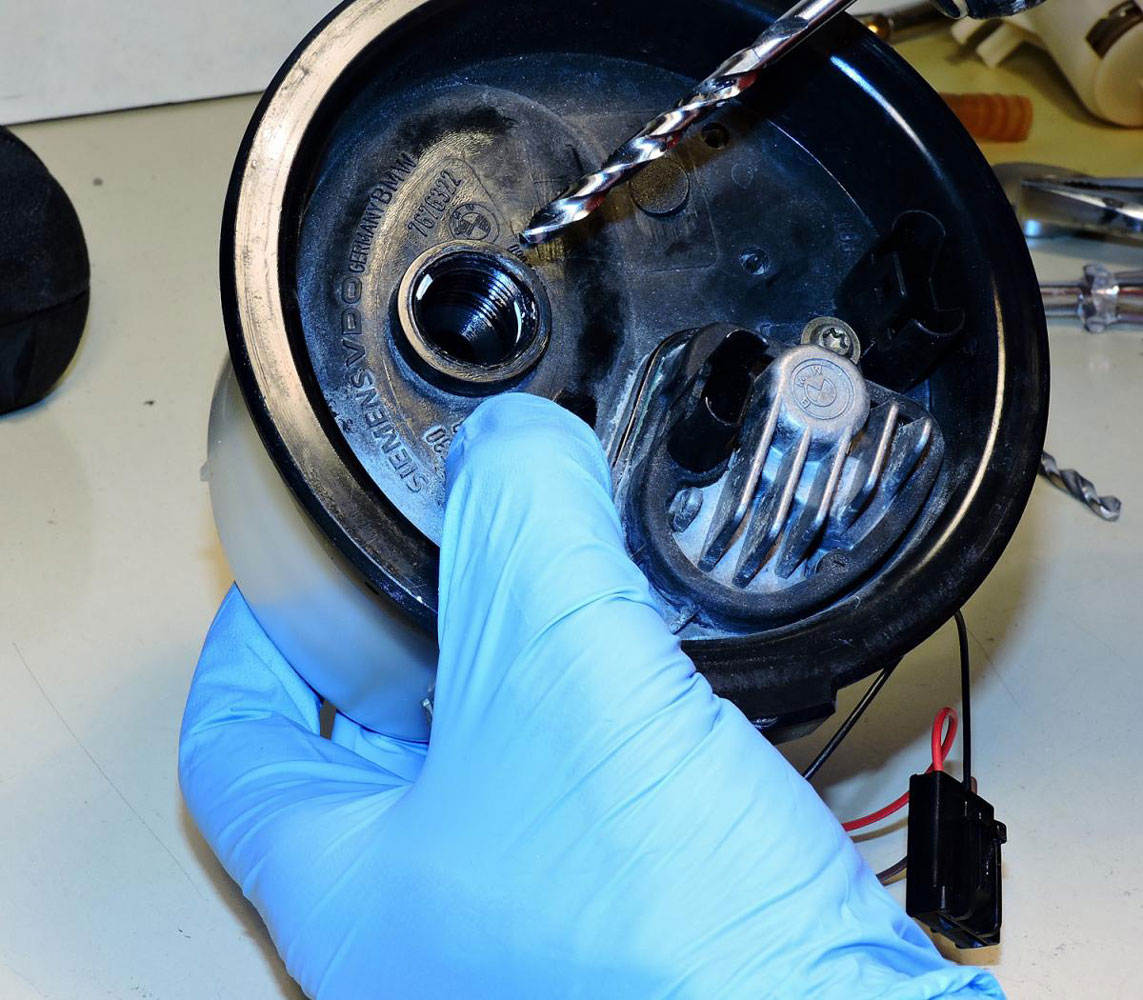
The esiest and less dangerouse way is to drill from the entry of the fuel hose, the filter bottom is only 5mm below and 5mm thick, no way to damage anything
NOTE you cannot separate the fuel hose, you can only cut it and get a new one (we do sell them, so no worries)
Not even heating it up helped me.
What I wouldn't do for Science !!!!
Now drilling with the 5mm point is really a child play.
Attenzione all’allineamento e via dritti, profondita’ di sfondamento 30mm, mettete la punta a 40mm e via andare
Tornando al singolo foro esterno, a me e’ sembrato molto piccolo i foro di uscita della benzina, 5mm quando tutto l’impianto e’ un tubo 8mm, e ho deciso di allargare anche per permettere la corretta eliminazione di piu’ trucioli di plastica possibili.
Ho quindi allargato sia il collarino di plastica che il foro sul fondo con una punta da 8mm, sempre di ottima qualita’.
A top quality drilling point will allow big chips to come clean, a bad point will make a mess, so TOP quality BRAND NEW drilling point a high revolution will give you the best.
Now source a nice in-line fuel filter, we also sell them, and install an in-line fuel filter on your frame outside the tank.
Using a Guglatech fuel neck prefilter, will allow you to change the external unit every 40-70.000 km depending on the size and will protect the fuel pump for many many years/km
www.guglatech.com